DIY Light Posts with String Lights – Beginner
This post may contain affiliate links and I may earn a small commission when you click on the links at no additional cost to you. As an Amazon Affiliate I earn from qualifying purchases. You can read my full disclaimer here.
Sting Lights DIY
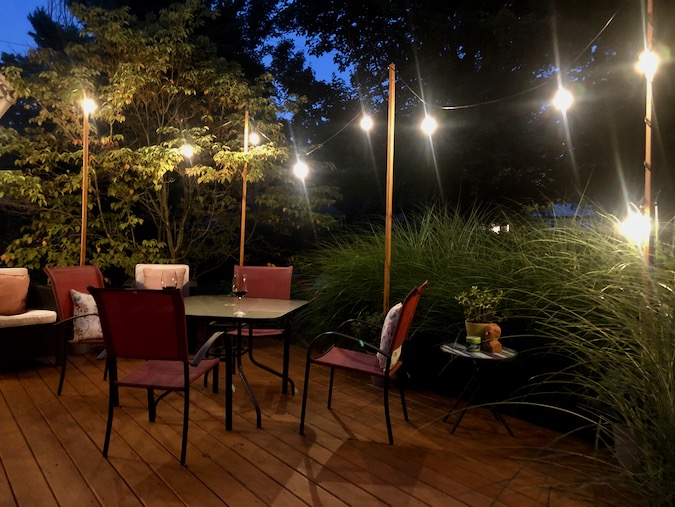
Lately, we have been trying to figure out ways to make outside more inviting. I have always loved the look of string lights over a deck or patio. It feels romantic and adds so much ambiance. Really wish I had done this project earlier in the year, but it is never too late. Fall is my absolute favorite season and it can get pretty chilly here in CT, but that is what cozy sweaters, blankets and red wine are for.
After looking at way too many tutorials on YouTube I decided to finally tackle a project I have been putting off. Honestly, looking back I have no idea why this took me so long to accomplish – It was sooo easy! If I can do this – you certainly can!
With all this quarantine business, I am finally getting the motivation to tackle some projects I have always wanted to accomplish. So, I ran to Home Depot with my trusty list and got to it! No turning back now!
Let’s get started
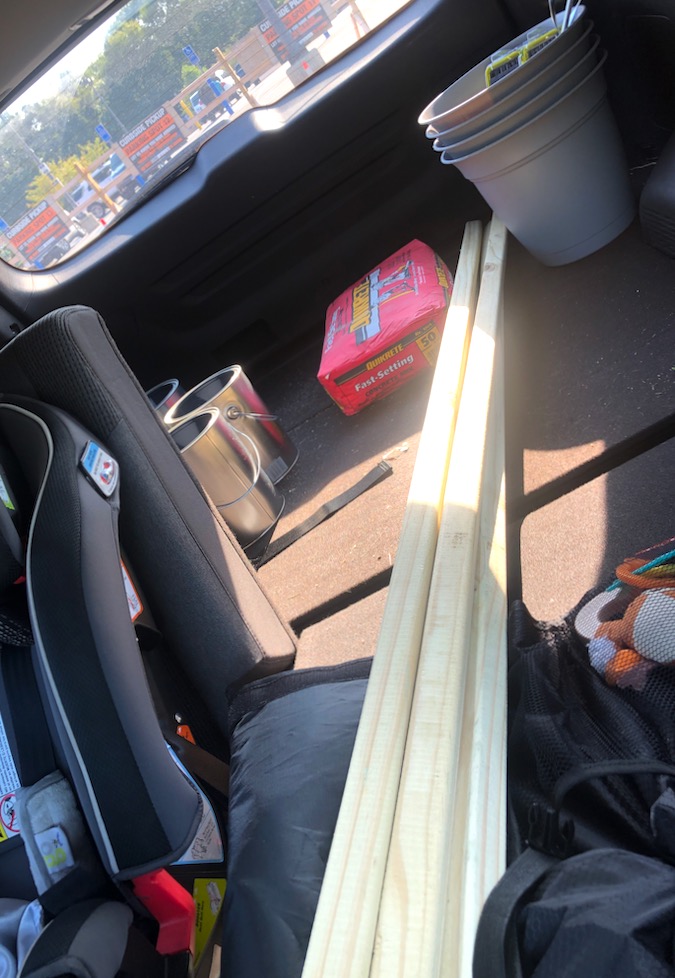
Here is my list of supplies (with links):
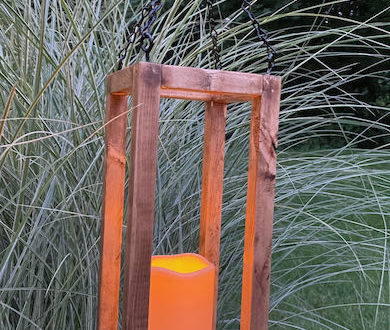
- 4 – Planters (base should be big enough to fit paint cans) – we opted to use the paint cans so we could pack it up easier if we chose to and now I can also change the pots if I ever want a different look. I really enjoy the flexibility of this
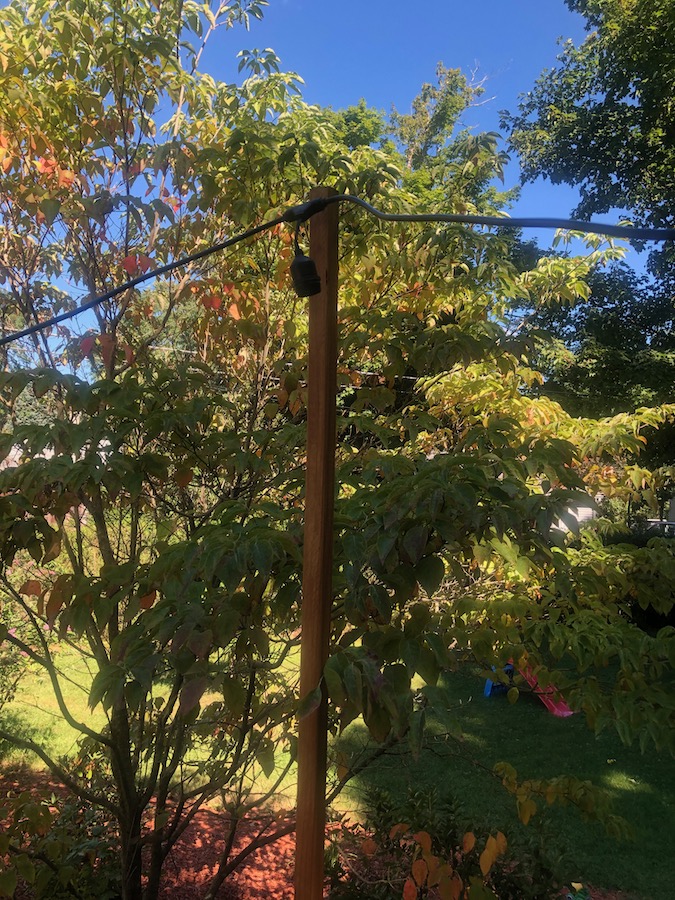
- 4 – 2x2x8 Pressure Treated Wood Boards
- 4 – Empty 1 Gallon Paint Cans
- 1 – 50lb Bag of Quikcrete
- 1 – 20lb Bag of Garden Rocks – this is totally optional but adds some additional weight
- 1 Set – String lights – length depends on the size of your deck or patio. We bought 2 sets and plan to add the other set over our driveway or even in our yard at some point
- 1 – 50lb of Play Sand – this was an after thought and works great for weight and additional drainage for plants
- 4 Hooks – this a taste option. I went with just simple little hooks. My boards are so long, you can barely see them so what they looked like wasn’t really high on my priority list
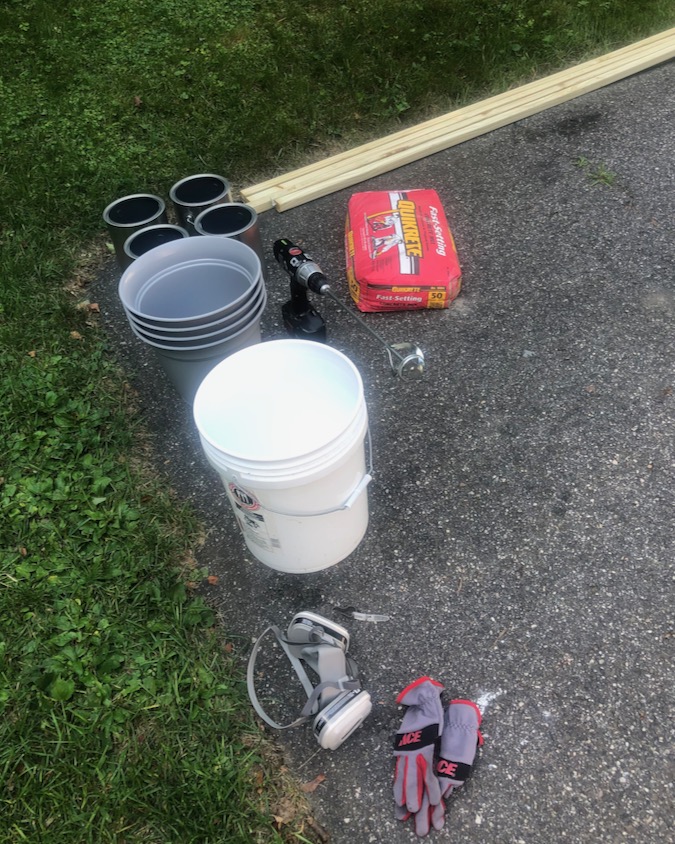
Some stuff I already had on hand:
- 1 Bag of Garden Soil
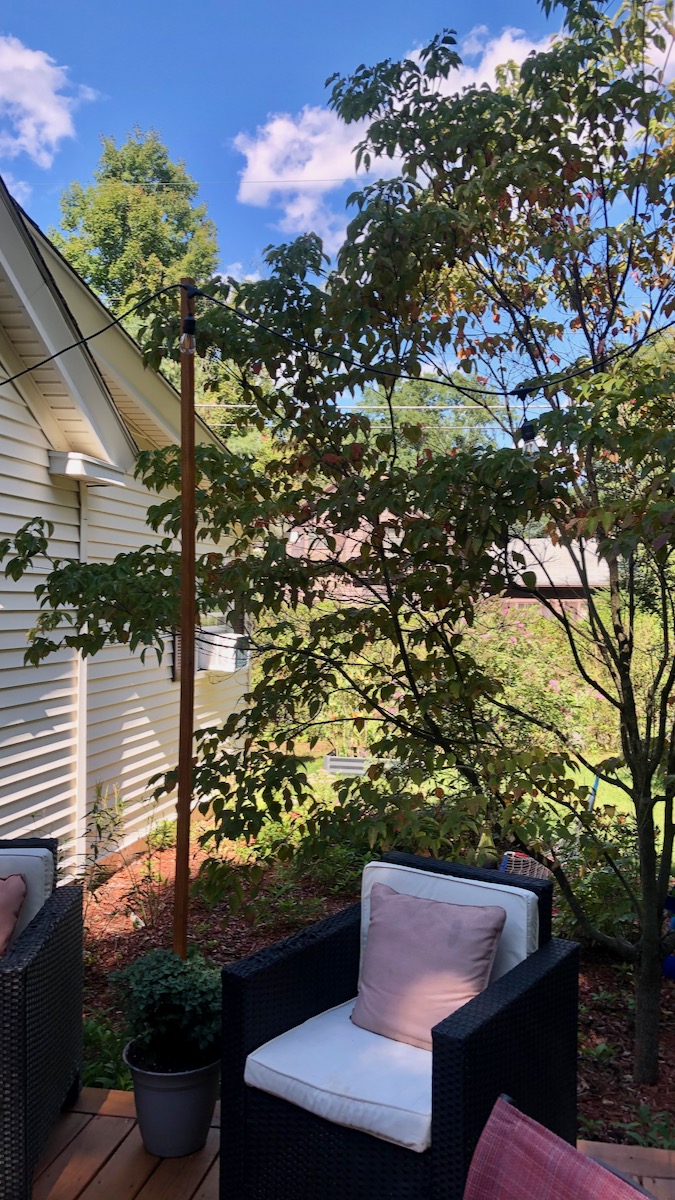
- Wood Stain – Cedar
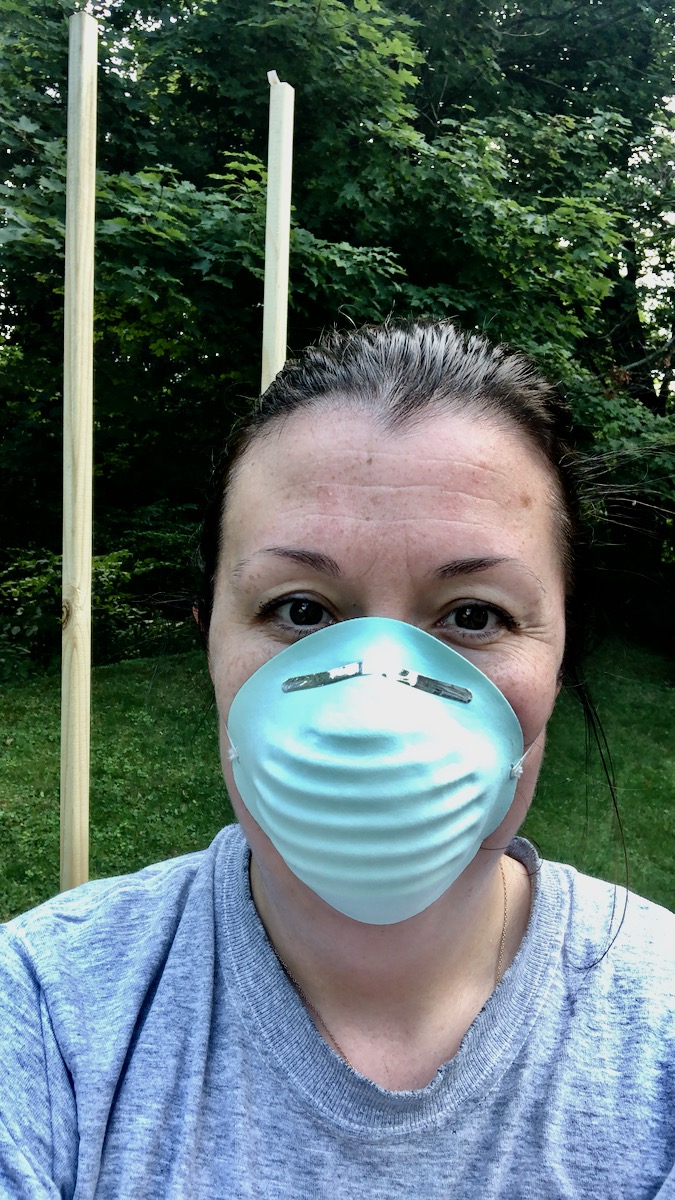
- Mask and Gloves for safety
- Empty Bucket for mixing Quikcrete
Leftover stain I had on hand from our new deck:

Instructions:
Gather all your supplies and lay everything out to keep it organized and easy to find. If you are doing this by yourself (like I did because I am stubborn and always need to have full control – ugh!) then you will want your items as close to arms reach as possible
SAFETY FIRST, the Quickrete blows dust everywhere and you don’t want to ingest that stuff. Where a mask! My husband pushed me on this and boy was I glad I was wearing a mask. Just don’t tell him he was right 😉
Next: I mixed my Quikcrete. I didn’t read the instructions on the bag. From what I learned after watching those many YouTube videos you really want a cookie dough consistency. With my first batch I made too much and it was incredibly hard to mix. It was a bit too thick during my first run to get to the bottom of the bucket to mix it all. However, with my next batch I started with a much smaller amount and slowly added water, mixed and then more water and just continued until I had the correct consistency. Unfortunately forgot to take pictures of this, but honestly it is pretty fool proof in my opinion. Some of my batches were super thick and some others not so much, but they both set perfectly.
Then I filled one paint bucket about 75% of the way, then I stuck in my 2x2x8 pressure treated wood board. If you have someone to hold it for you this part would go much easier – lol – I used my head to balance it once I got is centered and then used painter’s tape to keep it in place while the cement set.
Again – stubborn control freak here
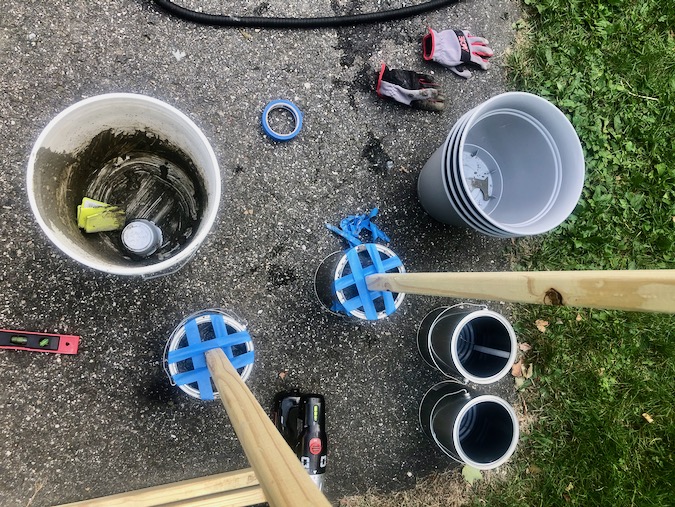
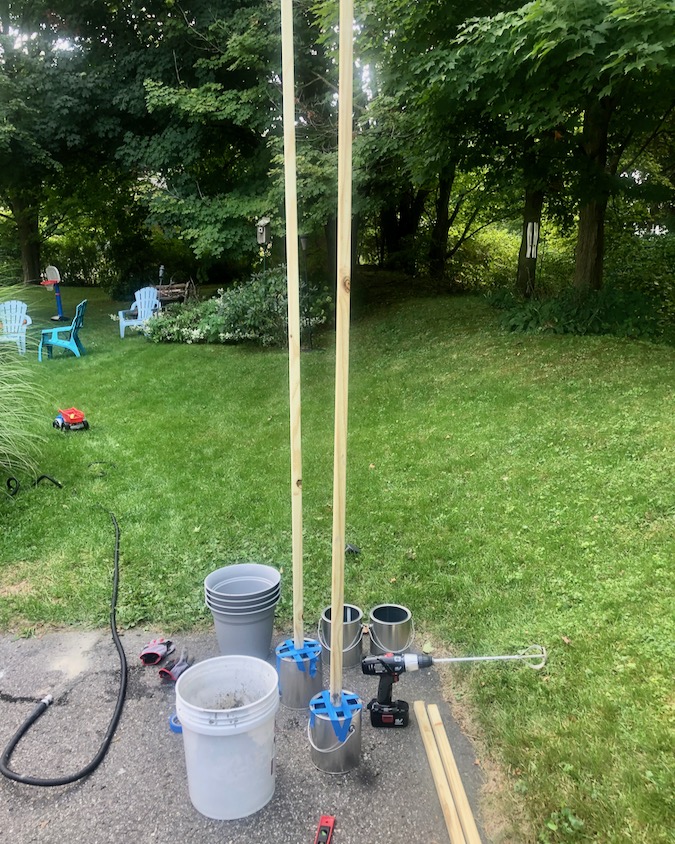
Go ahead and repeat this for as many paint cans you have. I chose to stick with four, but it really just depends on the size of your space.
Once all the cement is set – results may vary depending on what you buy. Mine felt like it was solid within 45 minutes.
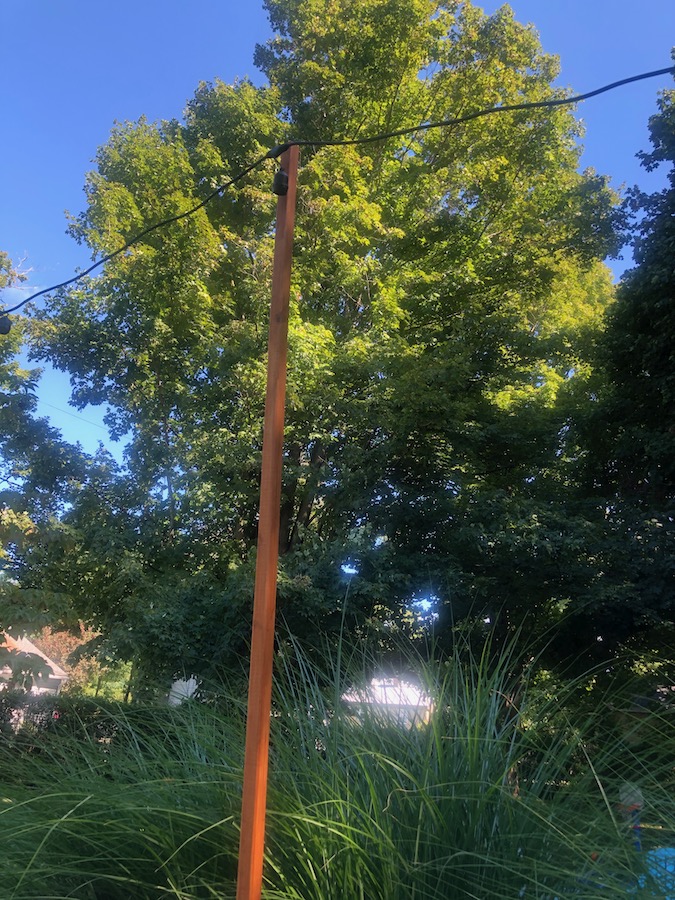
Then it was time to stain. I opted to stain my boards after they were set – I just figured it would be easier having the posts standing upright. Below is the color transition.

Put in your hooks. I predrilled these and then just screwed them in – Simple!!
Then I put some soil in and some of my garden rocks. I scored some mums for $1 a plant. They were on the smaller side and perfect.

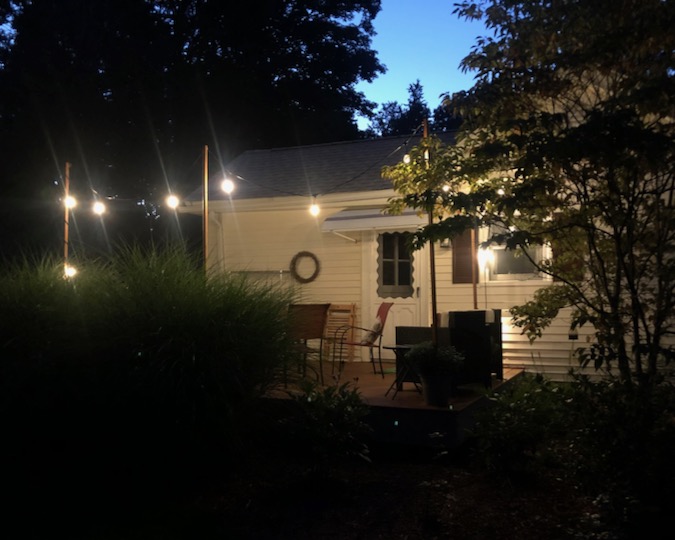
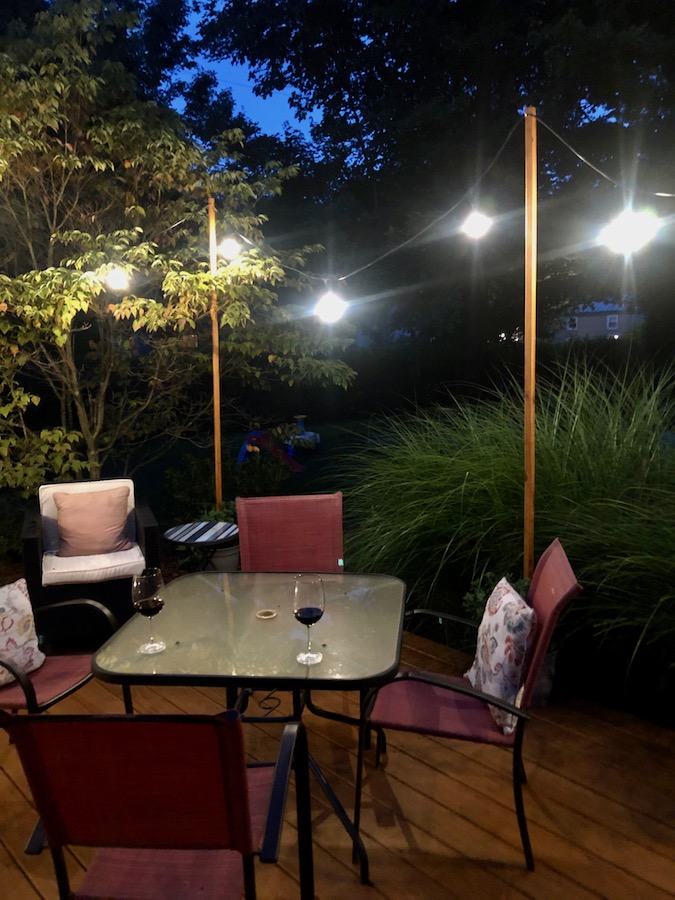
Time to string the lights and enjoy. All in all – this project only took a combined 4 – 6 hours, but a full weekend for setting and drying time.
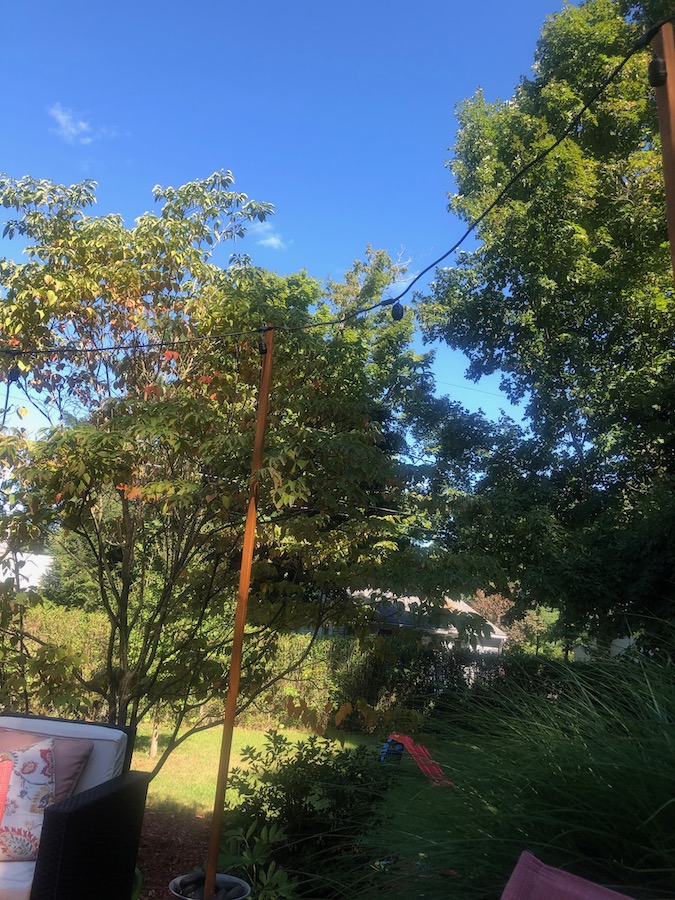
What do you think? I think this ambiance is on point!! Time for some red wine and charcuterie on this deck!

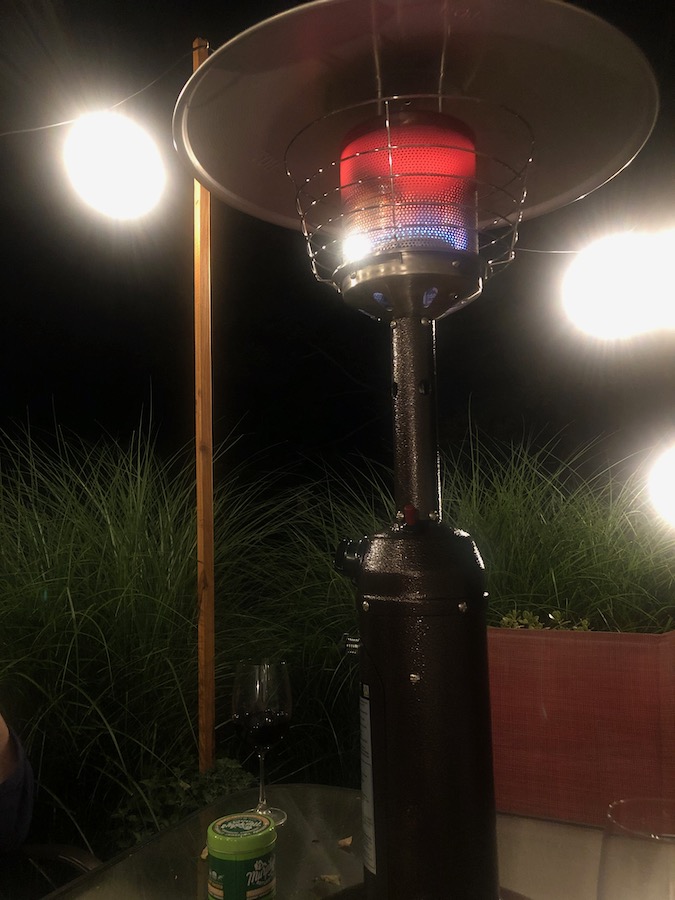
We also purchased a table top heater. Here is in CT it gets pretty chilly early in the Fall season so this should extend the life of us enjoying this beauty!
Enjoy – Stay Awesome!