DIY Lego Table for Kids
This post may contain affiliate links and I may earn a small commission when you click on the links at no additional cost to you. As an Amazon Affiliate I earn from qualifying purchases. You can read my full disclaimer here.
In this post, I will show you how I made this super easy DIY Lego Table for kids – I mean us big kids love it too! 🙂 Our household just entered lego land over here. Like the real ones – we are finally moving on from the trusty big Duplo Legos.
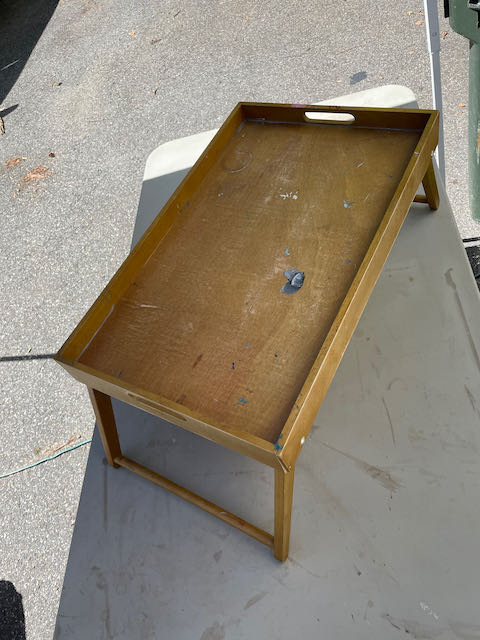
My mother-in-law has saved all of my husband’s Legos from when he was a kid. That’s A TON of Legos. What feels like thousands of legos from when he was a kid. We have been waiting until he was old enough and now that we are able to use these safely, I really wanted to make something fun for him to encourage this new land of creativity. We had this super old breakfast in bed table and I just thought it would make the best Lego table. I can’t tell you how many times I have almost thrown it away, but I am so glad I didn’t!
Let’s dive right into this Lego Table flip! This whole project only took about 2 days and that was just because I had to wait for paint to dry. Overall work time was probably at most 2-3 hours. It is the easiest and most successful DIY project I have ever done. I also love when I can create for our son – just makes it a little extra special.
List of supplies you will need:
- Table
- Primer
- Paint of choice
- Polyurethane
- Lego Flats (I used 4)
- Strong Glue
How to make this:
Step One:
Clean and prime the whole piece. This will make the paint adhere very nicely. This step really all depends on what you are using for your table and if you are painting vs staining. For me, this table had seen better days and it wasn’t real wood, so priming and painting was the best option for me.

Step Two:
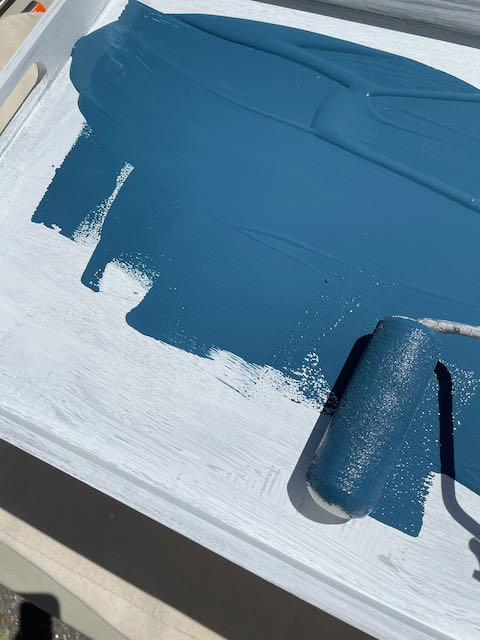
Once the primer is dried, paint the whole thing.
Step Three:
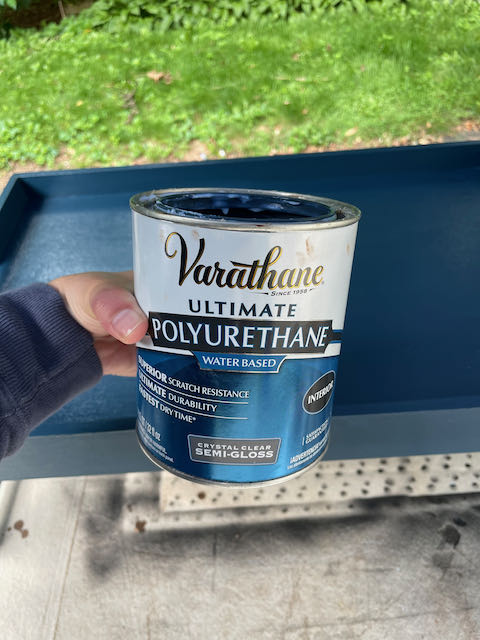
I added some poly to protect it. Let’s be real – this is a toddler tables, it will be used heavily, so protection is key.
Step Four:
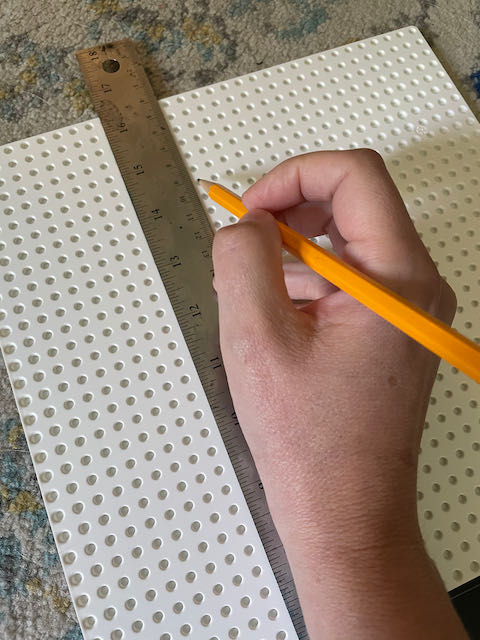
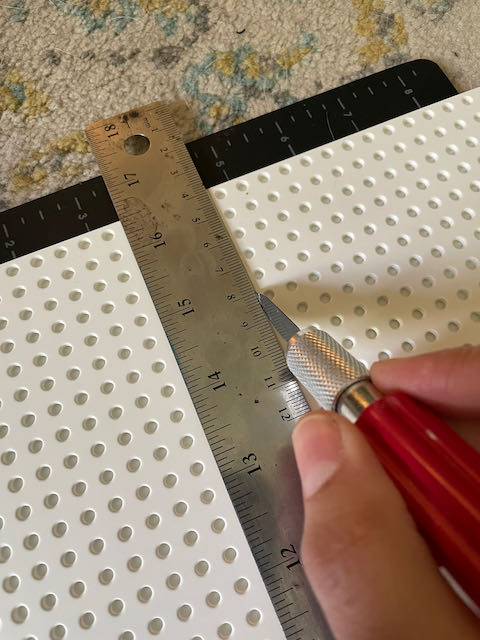
Then it was time to adhere the Lego flats. I just laid them out on the table and marked where I needed to cut. These cut so easily with a sharp exacto knife or box cutter. Just score it, then snap it and you are good to go.
I laid them down, but I put the pieces down and put actual legos on them. When joining the pieces together, I want to make sure the legos would still clip in as necessary.
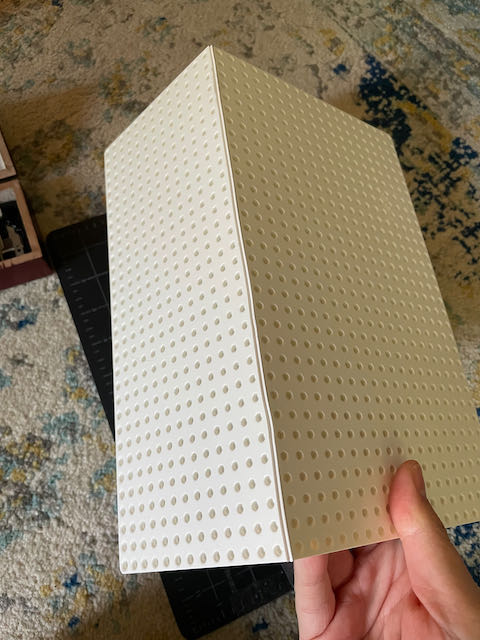
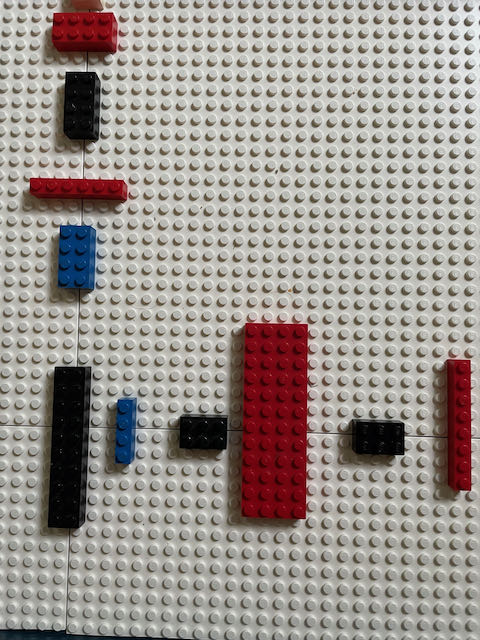
Quick Tip:
Before glueing and securing these flats, I recommend putting a few legos on the board like I show below. This will make sure the legos snap in correctly where the boards meet. You want all the pieces to be able to be used on this Lego table.
Step Five:
Now that everything is in its place, I just started going through each square and gluing them down. I just used Gorilla glue , because I just find it to be the best and it sets super fast.
We are done! Time to play and create with this hand crafted Lego table!
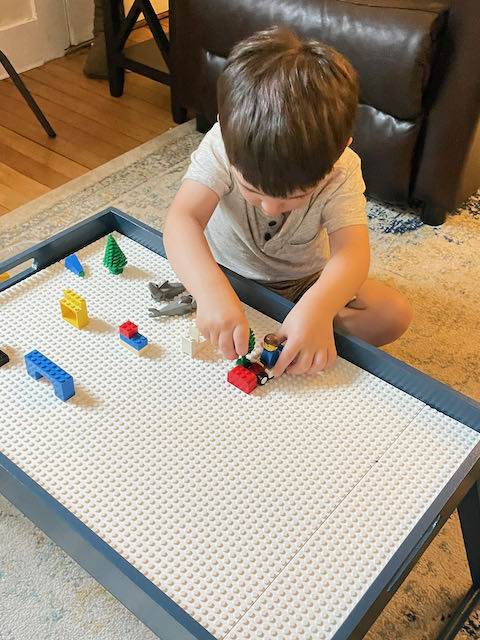
I hope you give this a try. You can really customize this Lego Table how ever you want. If you enjoyed this DIY, you may also enjoy this other upcycle DIY project.