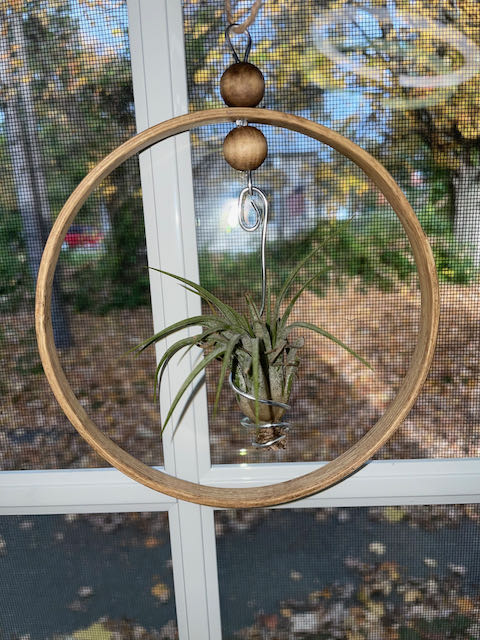
Easy DIY Air Plant Hanger (in under an hour)
This post may contain affiliate links and I may earn a small commission when you click on the links at no additional cost to you. As an Amazon Affiliate I earn from qualifying purchases. You can read my full disclaimer here.
Making gifts is one of the most fun things you can do, IMO. It really shows the receiver of the gift that you took time. Handmade gifts are also great for that person that has everything and you are stuck on what to get them. These will make wonderful gifts for literally anyone! Don’t know what to get for that teacher this year, maybe your mom is hard to buy for – why not make something personal that she can put in a window and admire.
Let’s get to it…
First let me start with mentioning, these are so incredibly easy to make. Air plants are also amazingly easy to care for. Just a little light and some weekly water spritzing and you are golden. In our house we don’t have a lot of shelf space so I love anything I can hang and I am really trying to get more plants in this house. Something about a beautiful plant – no matter how big or small – just makes me happy.
I will walk you through the steps here, along with all of the supplies – however if you don’t feel like reading through all of this, just scroll down for my quick video tutorial.
Materials you will need:
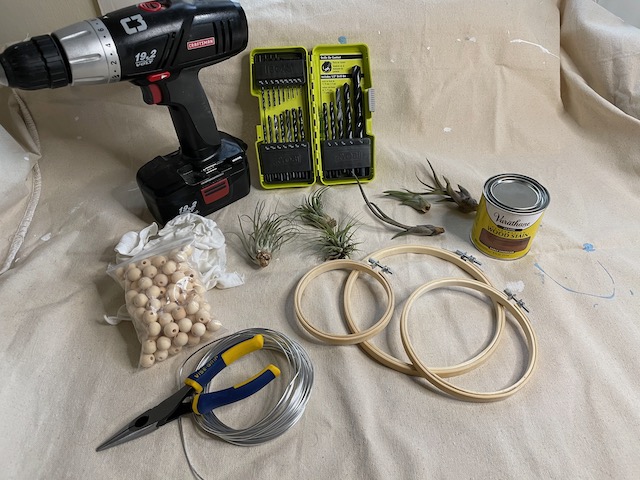

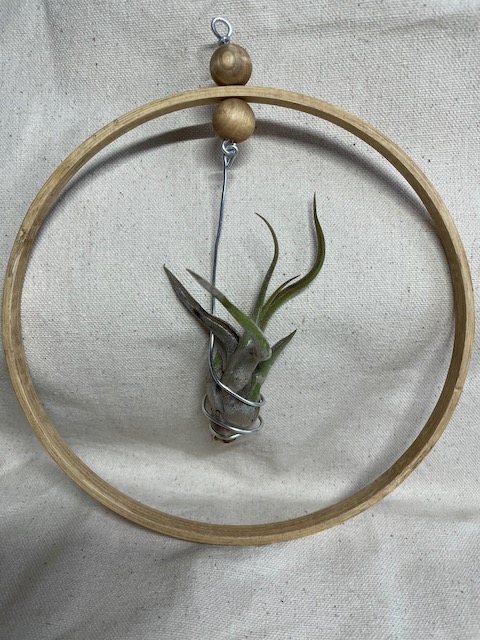
- Embroidery Rings
- Stain or Paint (totally optional)
- Wooden Beads
- Air Plants (I was skeptical ordering these on Amazon, but the seller did a great job packaging and they arrived perfect)
- String or thin rope – I just used some hemp twine
- Wire
Tools you will need:
- Pliers
- Rag for Stain (I just used one of my husband’s old t-shirts)
- Drill with a drill bit (just big enough to send a string through – I used a 7/64 bit)
Steps:
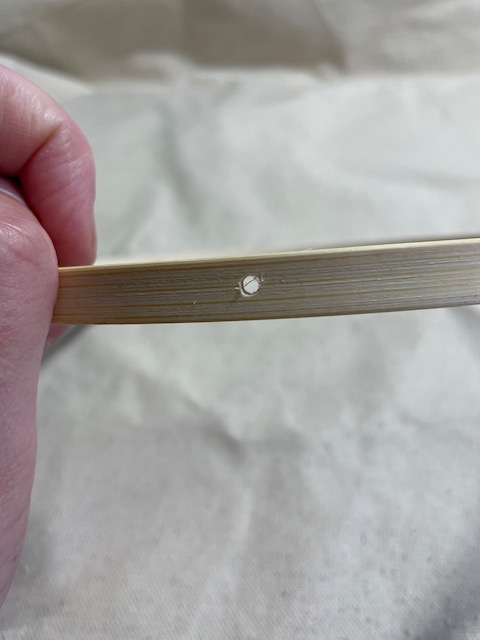
Separate the embroidery rings. I chose to to with the ring that didn’t have the metal thingy (what is that called anyway?)
Drill a hole through the ring. This will be where your wire goes.
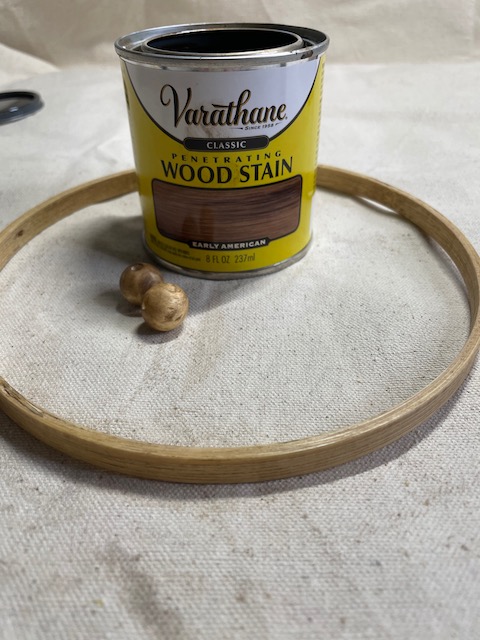
At this point I chose to stain mine. I feel like the green of the plant pops better on a darker wood, but totally your call. You could even paint these if you choose.
Now just grab your wire and gently wrap around the air plant. You’re essentially making a little base for it. It doesn’t need to be too tight, just enough to hold and be a little decorative. This took a little finessing for me.

Once that is done, now we need to make a little hook at the top. You may need to cut your wire a bit, so that the plant will hang centered in your ring. It all depends on what size ring you choose.
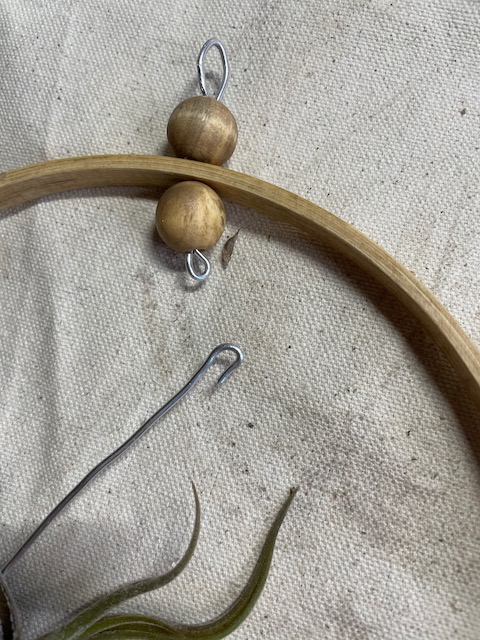
Cut another piece of wire to go through your drilled hole. I folded it in half to make a little loop for the hook to hang on and put some beads for decoration. I feel like it made it look a bit more intentional. Now just make another hook/loop at the top so you can hang it. Voila – your are done!

Wasn’t that easy? I love these because they are totally customizable to your taste. Choose a color, pick a plant and go. There are even wire color options. You don’t need to choose silver.I may try black wire next!
Here is the quick video that goes through the steps I outlined above.
Air Plant Holder Video Tutorial
Another Idea: Do you have a dried rose? I have a couple that hold sentimental value, but I never know what to do with them. Well, snip the stem off and use the same technique and there ya go.
I hope you enjoyed this quick little project!
Stay Awesome!