1 Very Easy Seed Paper DIY
This post may contain affiliate links and I may earn a small commission when you click on the links at no additional cost to you. As an Amazon Affiliate I earn from qualifying purchases. You can read my full disclaimer here.
It’s officially Spring!
Let’s work on an easy seed paper DIY. This is wonderful to do with your kiddos or to give as gifts. This seed paper DIY is so simple and doesn’t require a lot of materials.
What does Spring mean to you? For me, it’s a time to renew and refresh. Time to open those windows, smell the fresh air and watch everything come back to life again. I’ll admit, Fall is my favorite season, but Spring is a close second. I just love a good Spring project, so let’s jump into this seed paper DIY together.
As I write this I am sitting on my deck, just soaking up some much needed Vitamin D, surrounded by fresh green grass, planted flowers and herbs – feeling the urge for a glass of Rosé.
Our motivation for this project…
We always talk about the benefits of reusing and recycling and then even most recently Earth Day that just passed with our son. He is obsessed with holiday’s and loves to say that “Earth Day is every day!” I just love the fact that at just under 4 he is already into taking care of our planet.
This had me motivated to keep this level of thinking going. A couple of years ago we started planting bulbs in our gardens. We have a small side garden that he has lovingly taken as his own. The garden that he know endearingly refers to as “MY garden!!” He’s is really into watching his flowers come to bloom and learning which flowers bloom first and which ones come later in the season.
This brings me to the seed paper DIY. It’s a perfect project for yourself, but also to do with the kiddos. Easy to plant. Wonderful gifts. So rewarding!!
Let’s get into this super easy seed paper DIY project.
I have scoured the internet for tutorials and I kinda took a little bit from each tutorial to make these with what I already had on hand. I love a good project that doesn’t require me to buy a bunch and just use what I already have.
The paper
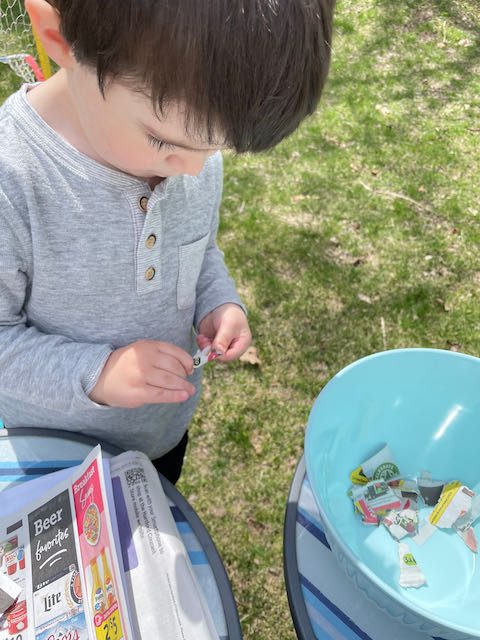
You can use so many types, but I suggest sticking with paper that can be recycled and paper that isn’t glossy. If you are like us, you get those grocery store flyers in the mail every weekend. This paper worked perfectly. You could also use copy paper. Just stay away from magazine type paper. I don’t think it will break down the way you need it to. This paper works perfect for the seed paper DIY.
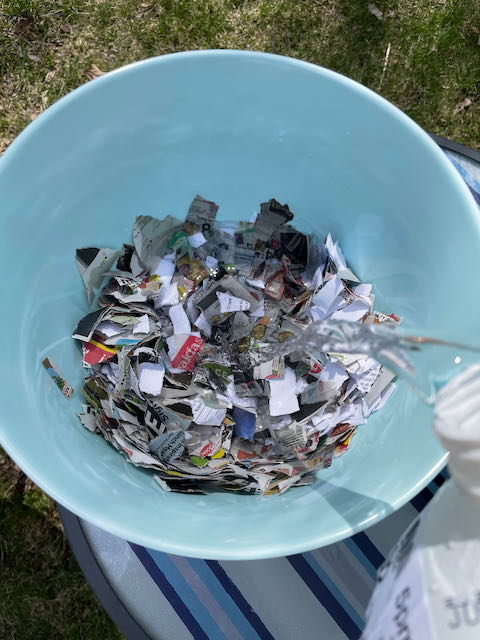
We just used our hands here to break it up into pieces. Working with a 4 year old – this was also a great fine motor skills activity. His little hands were also really great at tearing these into tiny TINY – haha – little pieces.
Next, just pour some hot water over and let them soak. Some instruction say overnight and some say a couple of hours. We opted for overnight, but depending on the paper you use a few hours would probably be fine.
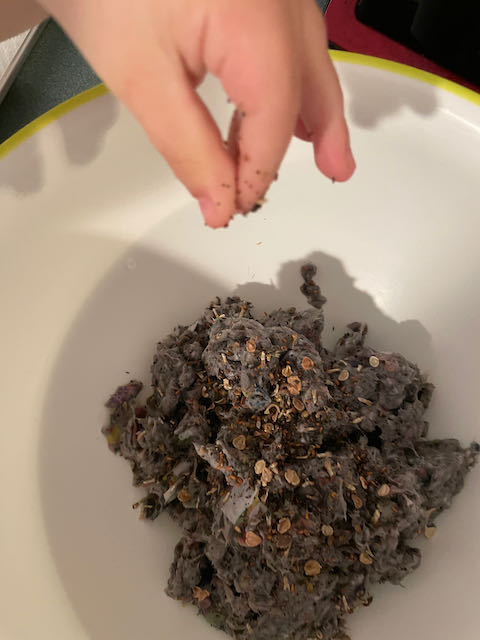
Once your paper has soaked in the water, now comes the blending part. I gotta tell ya, everyone has a different way of doing this. You could do this in a blender, but this is recommended to do with a blender you don’t plan on using for food. You could use a hand or stand mixer. You can even opt for not blending the paper. We decided to take our chances with our stand mixer and it worked fine. I mean if my stand mixer can shred a chicken breast in seconds, I figured it would probably work great for this and it did!!

I didn’t add all of the water that it was soaked in, just enough to help it mix and break apart. It really isn’t a fine science.
Now that the paper is all mixed, stir in your seeds. You don’t want to add your seeds in the mixing step because you could damage your seeds. I added a good amount – probably about 3 – 4 tablespoons worth of seeds.
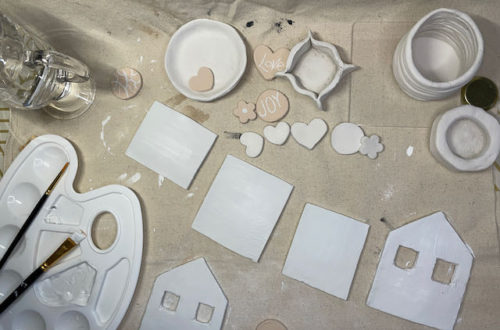
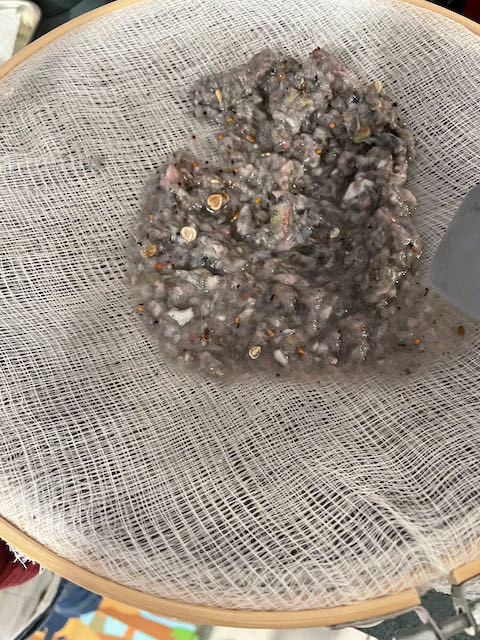
Straining. There are many methods you could use for this too. If you have an old frame and screen that you aren’t using anymore, this would be ideal. I did not have an old screen and didn’t really feel like going to home depot just to buy one for this. However, I did have cheesecloth and embroidery hoops! Win!!
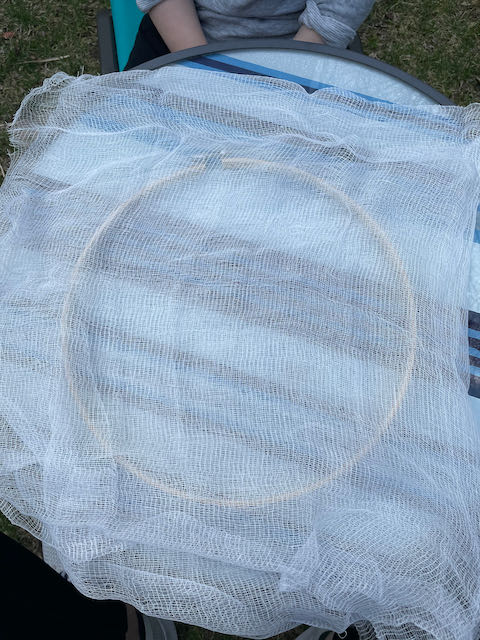
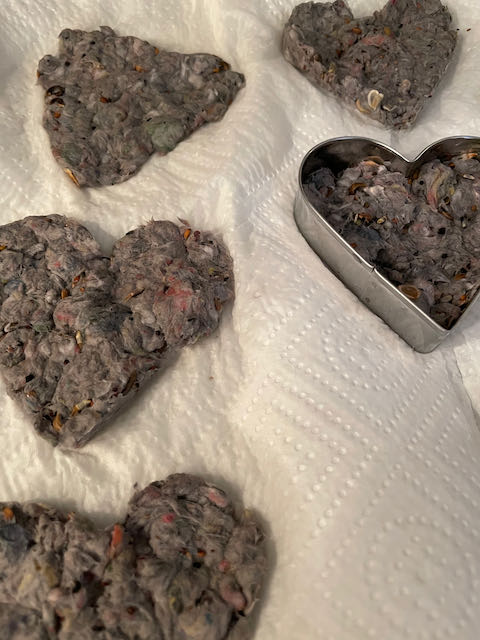
I placed my new homemade strainer over a bowl to catch the drippings and put some cookie cutters on top to attempt to make some fun shapes. We had a little success with this, not much, but some. But he did enjoy picking out the shapes and getting the sloppy seed filled paper into the cutters. As long as he was enjoying himself I say, it was success. Just make sure you get into all the crevices. I noticed as it was drying that some of them started to fall apart. Towards the end, I just took the rest and laid it out flat and made a big sheet.
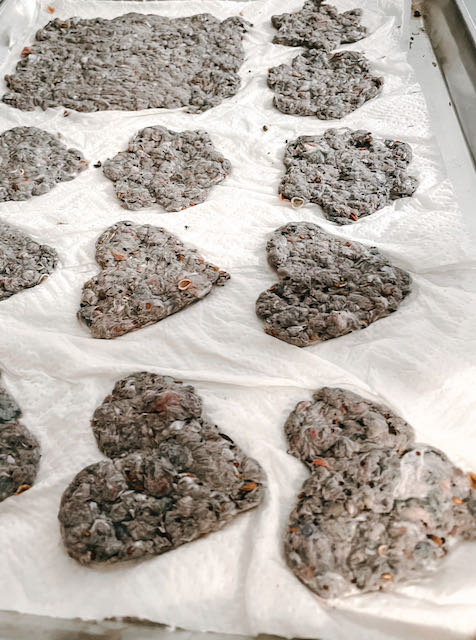
Transfer all of the pieces to some thing that will dry them out quickly. Keep in mind – you do not want to put these in the sun or a bright room! Then you may see your seeds pop! We don’t want that…YET! 🙂 We put some paper towels down on a cookie sheet and let them dry over night. Ours were a bit on the thick side, so they needed a bit more drying time. Once they were dry enough to move, I put them on a cooling rack. Some broke though. 🙁 It’s alright, cause they won’t go to waste – they will still get planted.
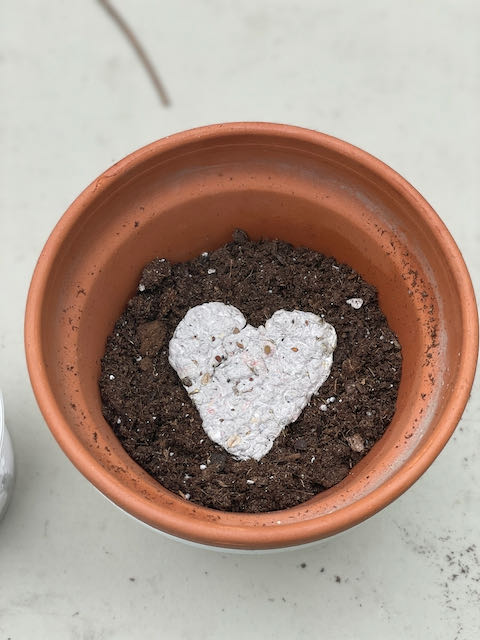
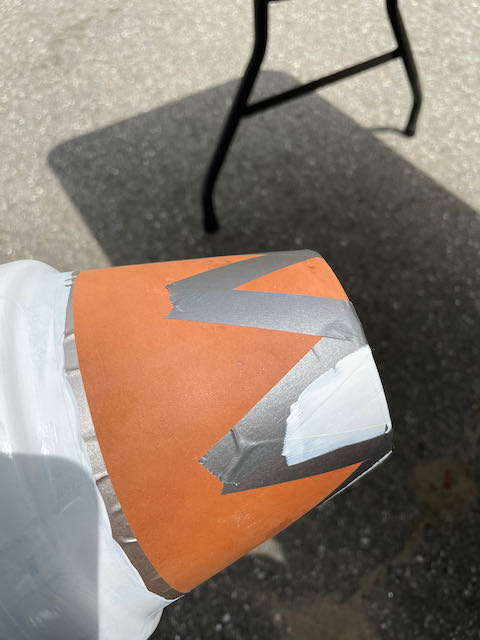
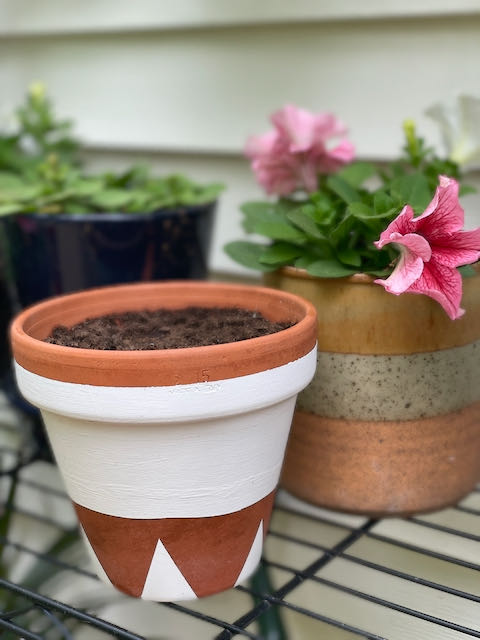
We gave some to our Moms for Mother’s Day. We did want some for ourselves though 😉 So I had this old terracotta pot kicking around that I gave a little face lift too. A little chalk paint and some fun design and these were ready to be planted.
I can’t wait to see our hard work pop with color. Even more I can’t wait to see his excitement when these flowers bloom and see all his hard work come to fruition.
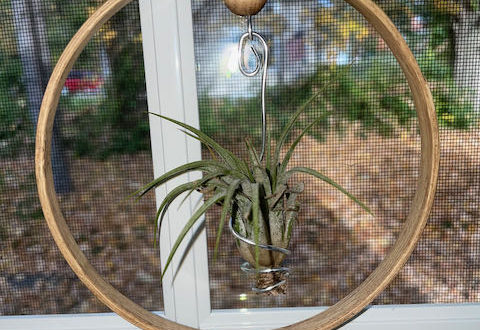
If you like this, check out this other easy DIY for Air Plant Hangers!