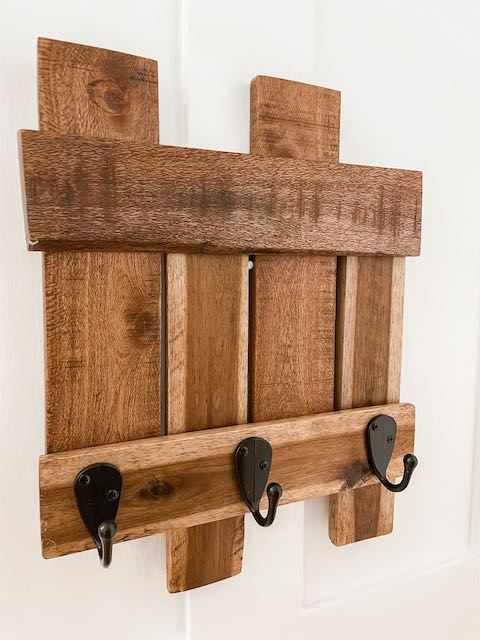
My First Pallet Project – EASY!
This post may contain affiliate links and I may earn a small commission when you click on the links at no additional cost to you. As an Amazon Affiliate I earn from qualifying purchases. You can read my full disclaimer here.
Come join my on my first pallet project. This is also my first time using any of these tools as well. Lots of firsts here. So, this is the truest form of beginner project. This was literally the first time I used any of these new tools! Other than burning a pallet in a bonfire, this is also the first time I have never worked with a pallet before as well.
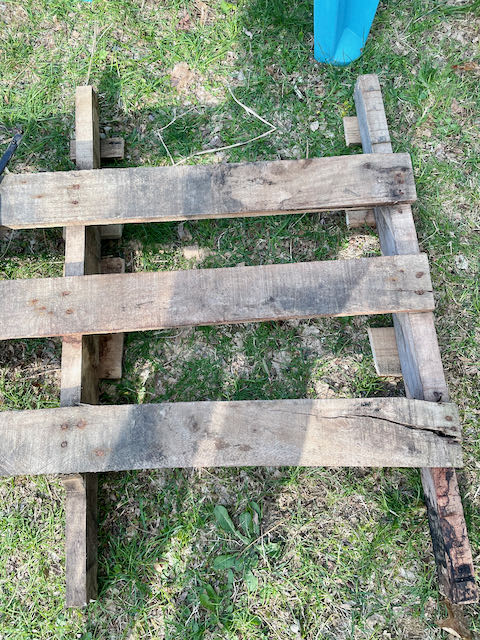
I will say I am super in love with my first pallet project and a bit proud of myself for trying!! It came out better than I could have expected. We received this pallet from Home Depot with our mulch delivery. In years past, I have always wanted to make something with them, but I just never did. It would always end up in the bonfire.
This year I am determined to start working with wood and some real tools. Don’t get me wrong, I do love my glue gun, but I wanted to really make something bigger. This is just the start. Come along with me while I attempt to make something – lol. I promise, it’s pretty cool! So, let’s just jump right into my first pallet project.
This really is one of those “If I can do it, so can you” times
Here are the tools I used:
- Sawzall or Hand Saw (you don’t need this if you can pry your boards off with a crow bar)
- Circular saw
- Orbital Sander
- Crow Bar
- Power Drill
- Screws
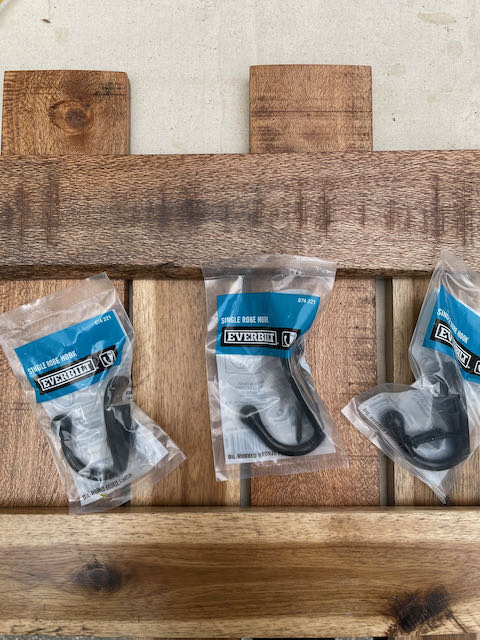
- Hooks
- Stain
- Polyurethane
Instructions:
Disassemble
Here is where it did get a little tricky for me. My pallet was awful!!! It was in such bad shape. There were so many nails in each piece…soooo many nails. Not too mention they were all crooked. Every time I tried to use the crowbar to get them off, the wood would just break. So if you don’t run into this issue like I did – then you should be golden.
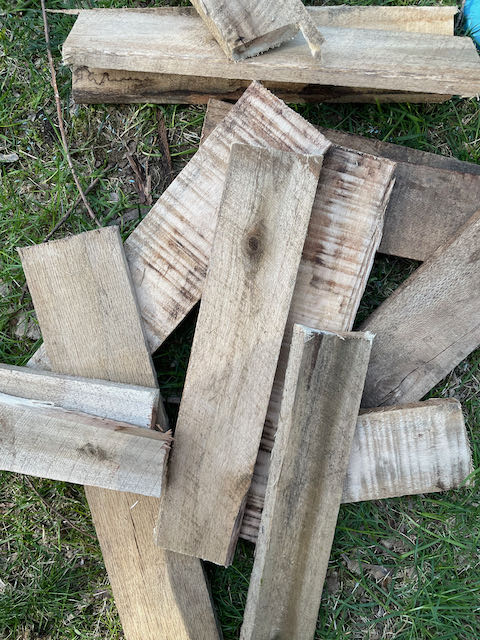
Once I tried for (what felt like forever) I just decided to take my husband’s sawzall and cut them off. You only need smaller pieces for this project anyways, so it was totally fine.
Sanding
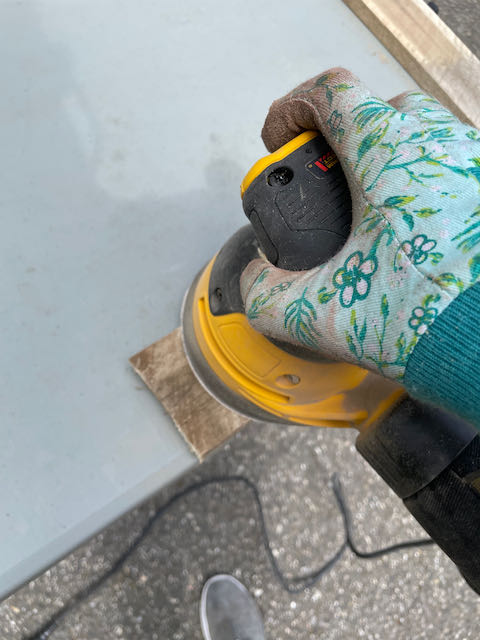
After I had all my pieces cut off the pallet, I started sanding. I started with a rough grit sandpaper to get rid of some of the really bad imperfections and then worked my way up to a finer grit. Don’t worry about them being perfect. Some of the charm of this is those imperfections, so use them in your favor.
Cuts
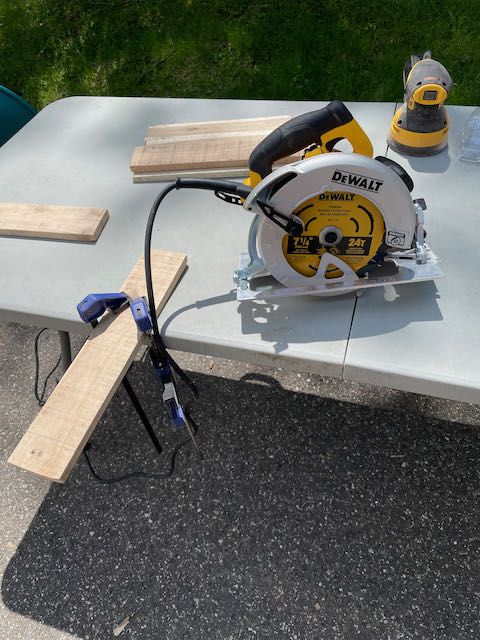
Time to bring out the big guns – the circular saw. Before you make any cuts, always remember Safety First!! I had never used this tool before and to say I was intimidated, was an understatement! I must have watched 15 videos on how to use it and another 50 on safety. Seriously though, I want to keep all my fingers.
I cut 6 pieces to about 13 inches long for each board. The widths were all a little bit different, but again, we are working on charm here, not perfection. Once that was done, I did a little more sanding to clean up the edges.
Stain
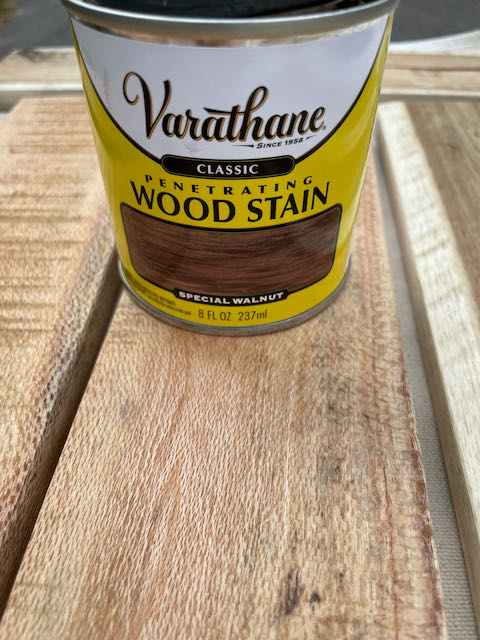
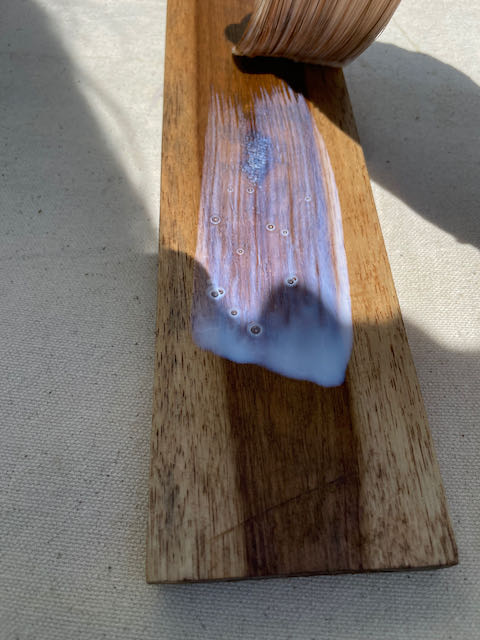
Once I had all my pieces, I stained all of them with Special Walnut Stain by Varathane.
Once that dried fully I added a coat of poly. The poly isn’t totally necessary, but I just liked the additional finish and protection it gives.
Assembly
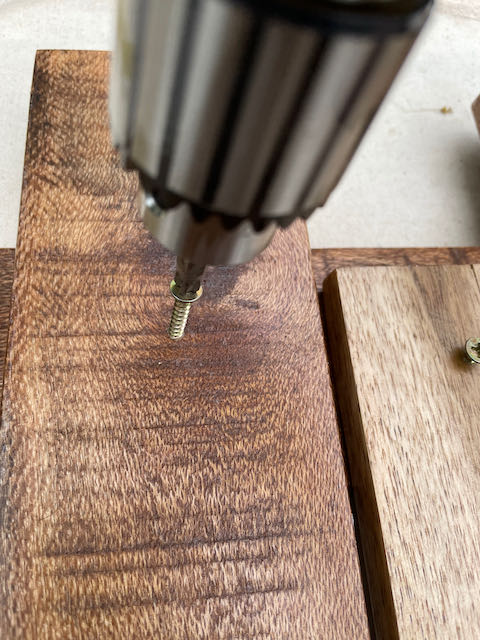
I started by laying out the pieces and moving some around figuring out where I wanted them all to sit. Since some of the wood pieces were a bit different, I wanted to see what I liked best. Once I found a layout I liked, I just flipped it over one by one to keep that layout and drilled some pilot holes and then took my screws and drilled them into the back to secure the back to boards. I put one screw on each board for the top and bottom.
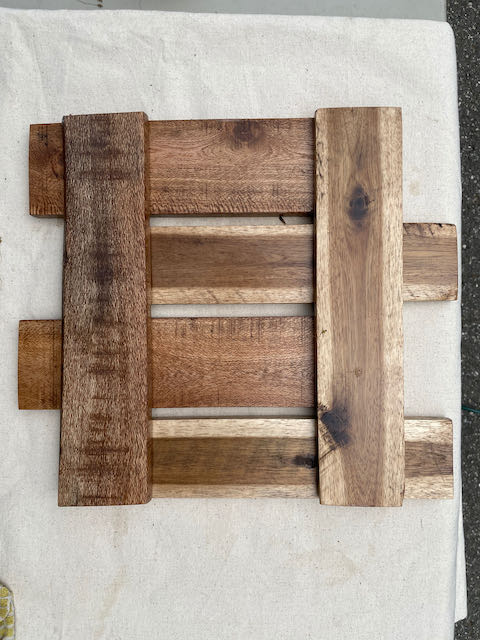
From there I flipped it back over and added some hooks. You can really choose any style you like here. I really enjoy the contrast of the black hooks on the wood stain.
Now that is it! You are done. Super easy, right?
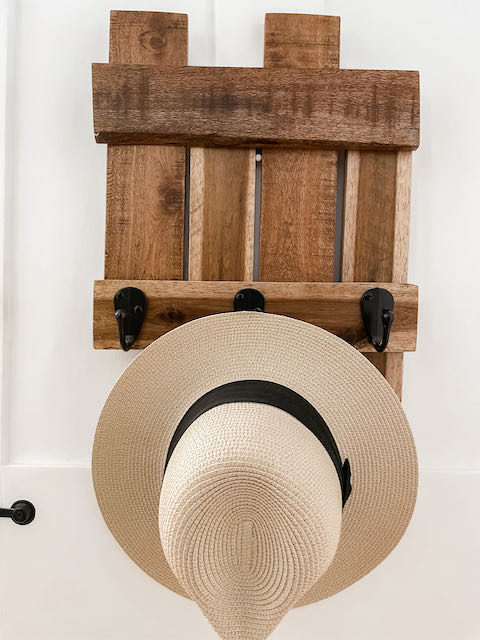
I really enjoyed how this turned out and for my first ever wood project and my first time using these tools, I am pretty damn proud of myself.
If you liked this, you may also really enjoy this one too!